
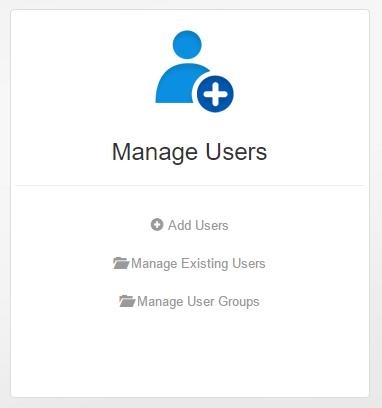
This section allows you to manage all your own users’ access, giving you the ability to add and have complete control over as many users as you require and in Validate Data Manager to separate users into groups, restricting their access to data. To make this process as simple as possible we have given you 3 menu options which are:
- Add Users
- Manage Existing Users
- Manager User Groups
The menu looks as below
Adding users
We’ve kept adding users as simple as possible. Select the option Add Users and this will bring you to this screen.
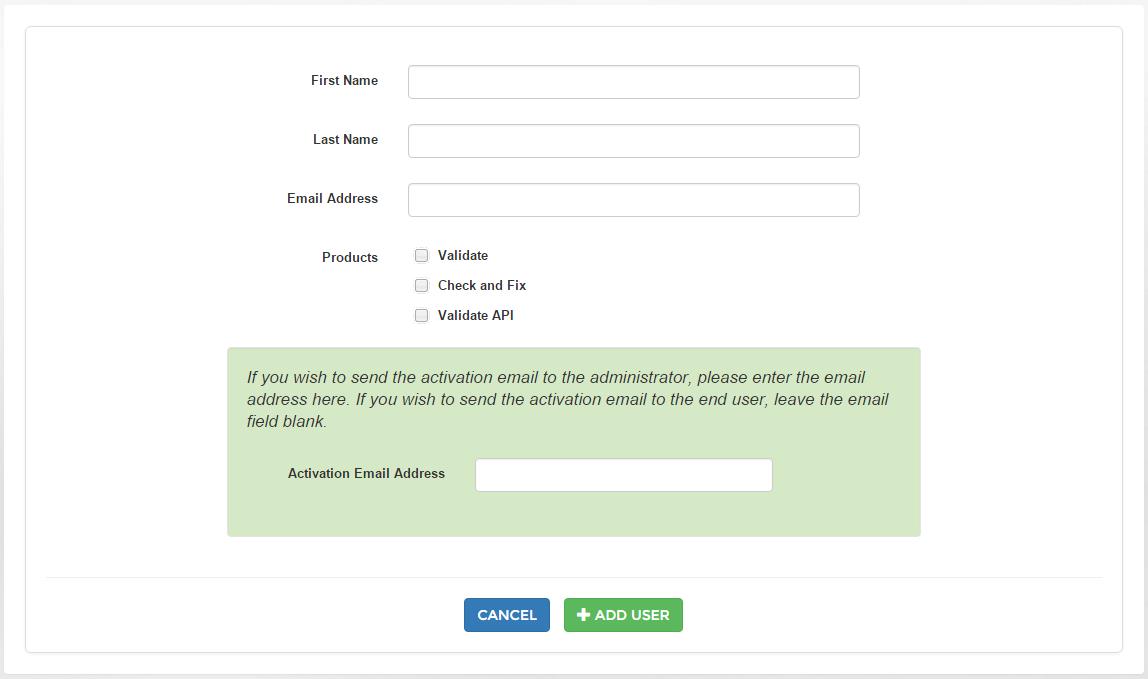
All you need to do is add the users name, add a valid business email address, select the products you have that you wish to give the users access too.
If you are adding a new user and don’t want the details to be sent to the end user but want the account details sent to an administrator to later be sent to the end user, then simply enter the administrators email address in the Activation Email Address box and the account details will be sent to this email address.
The user will receive the details of their account in an email to their registered account so be sure to enter a valid email address.
User Roles
The following user roles are available
| Role Name |
Products |
Manage Users | Subscriptions | Company Configuration | Support and Feedback | Documentation | Reports |
| Company Super User |
Y |
Y |
Y |
Y |
Y |
Y |
All Company Users |
| Product User |
Y |
Y |
Y | Own use only | |||
| Compliance User |
Y |
Y |
Y |
All Company Users | |||
| Company Administrator |
Y |
Y |
Y |
Y |
Y |
All Company Users | |
| User Administrator |
Y |
Y |
Y |
Y |
All Company Users |
Managing Existing Users
To manage existing users select the manage users option and you will be presented with a list of the users for your company.
The top row will detail the company name of the left and the list of administrative users for the company and their contact details on the right.
Below this is the list of all your users and in the top right of the users list is a search box. You can type into this any element of the user’s details that you are searching for and the list will filter in real time for ease of access.
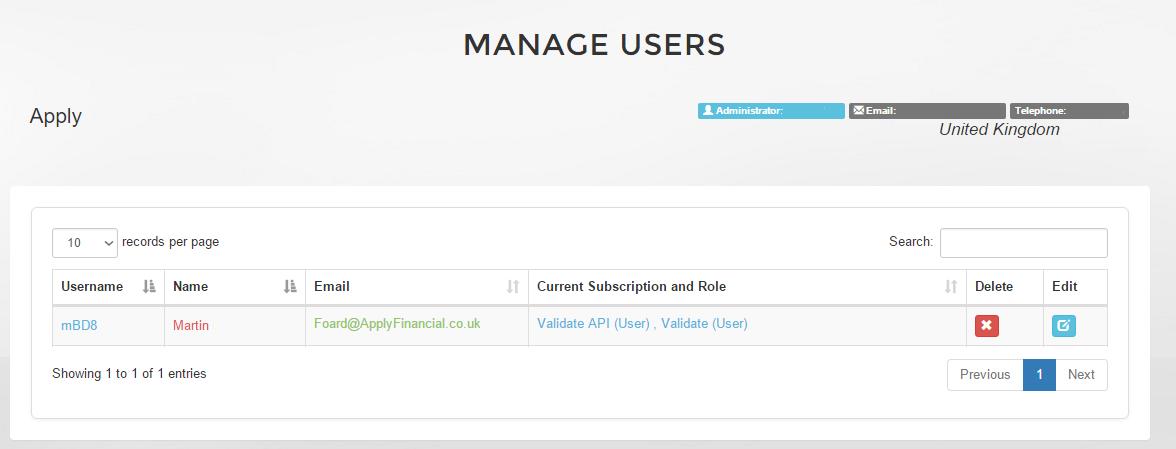
On this screen for each use you can see what their username is (this can be either the username or the users email address both work). The name of the user and the products you have given them access to.
This also tells you which role the user has. The two roles are
User
This allows the person to use the products they have access to.
Admin
This allows the user to access admin features in the self-service hub (for example manage users) and to access admin features for that application.
Delete
This will delete the user and remove their account from your company.
Editing a user account
By selecting the Edit button for a user you will be presented with the following screen which allows you to amend all the details for a user and their access to the products.

Edit Info
At the top right you have the EDIT INFO button. This allows you to edit the users detail, including their name, business address, contact details and email address. On changing the email address the user will be sent a confirmation email which they must click the link in to confirm the email address. If the user fails to do this then the will not retain access to the products and the account will be suspended.
Reset Password
At the top right you have the RESET PASSWORD button. If the user has forgotten their password it can be reset using the forgotten password link on the application log in page or the administrator can go to this screen and select the RESET PASSWORD button, which will send the user a reset password link.
User Role
By selecting edit for a user you can change the users role in an application and you can either give or remove access from the users
This also tells you which role the user has. The two roles are
User
This allows the person to use the products they have access to.
Admin
This allows the user to access admin features in the self-service hub (for example manage users) and to access admin features for that application.
Don’t forget if you change a user’s role to click the save button.
Add Product Access
At the bottom of the screen you will see the listed the products that you have a subscription to and that the user does not have access to. By clicking the button under Add Product you will give the user access to the product in the role that you have selected.
Remove Product Access
From here you can remove access to a product or products by clicking the delete button